Creating APIs in Godspeed
Step-by-Step Guide to create APIs in Godspeed framework
Creating a REST API in Godspeed involves defining an HTTP event to handle incoming requests and configuring a function to process the data and return a response.
Here’s a step-by-step guide to setting up a REST API in Godspeed.
Step 1: Confirm HTTP EventSource Configuration
Open src/eventsources/http.yaml to confirm the Express plugin (the HTTP eventsource) is installed and configured correctly. Click here and check how the default http.yaml file look like
Step 2: Define the API or HTTP Event
In Godspeed, each API endpoint is represented by an HTTP event. Here’s how to define an event using to create a simple API that takes a name as input
Create an Event:
Create a YAML file in the src/events/ directory (e.g., greet-user.yaml).
Define the HTTP Event to handle POST requests at the /greet endpoint and expect a name in the request body and returns a greeting.
http.post./greet:
  fn: greet-user
  summary: Greet a user
  description: Accepts a name in req body and returns a greeting
  authn: false
  body:
    content:
      application/json:
        schema:
          type: object
          properties:
            name:
              type: string
              description: Name of the user to greet
  responses: # JSON-Schema of API responses set as per Swagger's standard responses syntax
    200:
      description: Greeting message
      content:
        application/json:
          schema:
            type: object
            properties:
              message:
                type: string
                example: 'Hello, John!'
    400:
      description: Bad request if name is missing
      content:
        application/json:
          schema:
            type: object
            properties:
              error:
                type: string
                example: Invalid request. 'name' is required.
Step 3: Set Up the function
Now, create a function to process the request in the src/functions/ directory. Function logic can be written either in typescript/javascript or in yaml.
3.1 Typescript function
Hereby sharing a typescript function which shows all that you get in your event handler function when an event is triggered. The generic input structure is constant whether for Express, Fastify, Kafka, Salesforce, Socket etc.
All that you get in your typescript function:
import { GSCloudEvent, GSContext, PlainObject } from "@godspeedsystems/core";
import Pino from 'pino';

export default function (ctx: GSContext, args: any) {
    const {
        inputs: {
            data: {
                params, //path parameters from endpoint url
                body,  // request body in case of http and graphql apis, event data in case of message bus or socket
                query, // query parameters from rest api
                user,  // user payload parsed from jwt token
                headers //request headers in case of http and graphql apis
            }
        },
        childLogger, // context specific logger. Read pino childLogger for more information
        logger, // Basic logger of the project, generally prefer childLogger for logging
        outputs, // outputs of previously executed tasks (if any)
        functions, // all loaded functions from the src/functions/ folder
        datasources, //all configured datasources from src/datasources
        mappings  //mappings from src/mappings folder. this is useful for loading key value configurations for business logic of your project
    }: {
        inputs: GSCloudEvent,
        childLogger: Pino.Logger, // you can also add custom attributes to childLogger
        logger: Pino.Logger,
        outputs: PlainObject,
        functions: PlainObject,
        datasources: PlainObject,
        mappings: PlainObject
    } = ctx;

    // Will print with function_name and task_id attributes.
    childLogger.info('Server is running healthy');
    // Will print without function_name and task_id attributes
    logger.info('Arguments passed %o', args);
    logger.info('Inputs object \n user %o query %o body %o headers %o params %o', user, query, body, headers, params);
    logger.info('Outputs object has outputs from previous tasks with given ids %o', Object.keys(outputs));
    logger.info('Datasources object has following datasource clients %o', Object.keys(datasources));
    logger.info('Total functions found in the project %s', Object.keys(functions).length);

    // Returning only data
    return 'Its working! ' + body.name;

    //SAME AS
    return {
        data: 'Its working! ' + body.name,
        code: 200,
        // success: true,
        // headers: undefined // or u can set response headers as key: value pairs,
        //for example headers:{custom-header1:"xyz" }
    }
    //SAME AS
    return {
        data: 'Its working! ' + body.name,
        code: 200,
        success: true,
        headers: undefined // or u can set response headers as key: value pairs,
        //for example headers:{custom-header1:"xyz" }
    }
}
Example typescript function to return greetings with user's name
This function will take the name from the request and return a personalized greeting.
greet-user-function.ts
  import { GSCloudEvent, GSContext, PlainObject, GSStatus } from "@godspeedsystems/core";
  export default function (ctx: GSContext) {
      const {
        inputs: {
              data: {
                body
              }
          },
      }= ctx;
      return new GSStatus(true, 200, 'OK', 'Hello ' + body.name, {});
  }
Step 5: Test the API
- Start the Godspeed Server:
godspeed serve - Access Swagger UI:
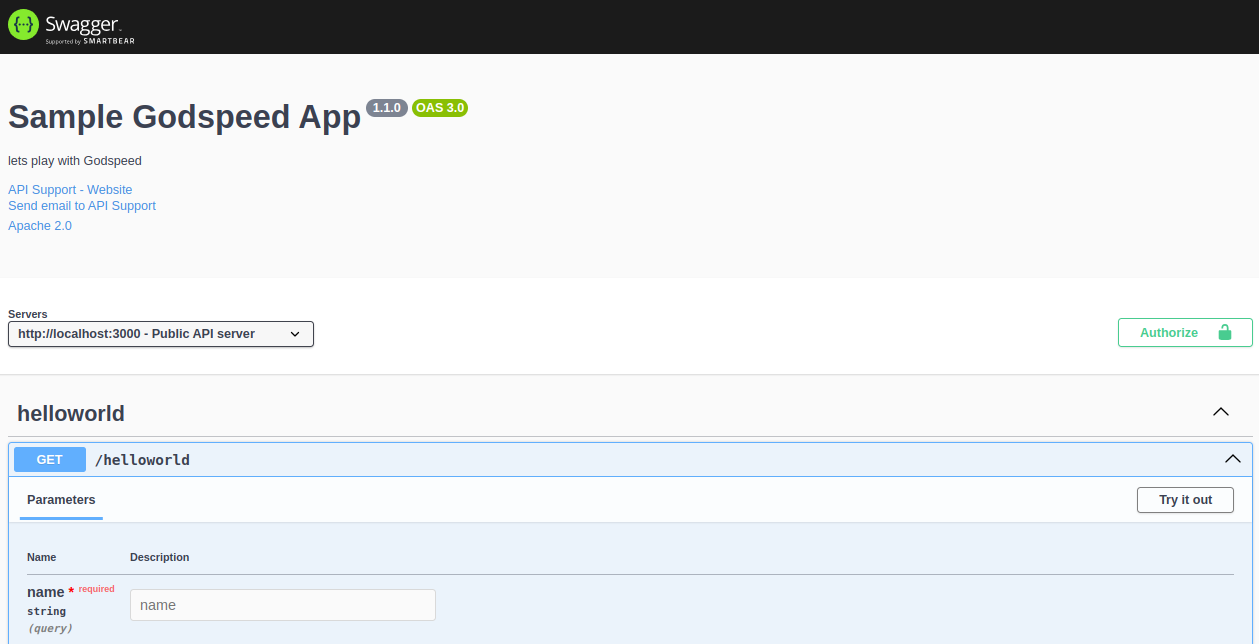
In Godspeed, the Swagger UI is generated automatically for all defined events for documenting and testing the APIs.
Swagger UI is typically accessed at the /api-docs endpoint, appended to the base URL and port where the server is running.
Here’s the general format for accessing Swagger UI:
http://<BASE_URL>:<PORT>/<http_docs_endpoint>` deafult example, http://localhost:3000/api-docs
- If your server is hosted on
example.comand running on port 8080:http://example.com:8080/api-docs
Here is a Screenshot of sample Swagger UI :

-
Test the /greet Endpoint:
Select the POST /greet endpoint in Swagger. Provide a JSON body with a name:
{
  "name": "John"
}
Execute the request and verify the response.